There are two things to understand before you begin teaching your child how to write their name. The first is that you need to start by teaching your child how to recognize their name. The second is that your child needs to be ready to write letters. Some children are interested in writing earlier, while others are later. My daughter was 3 when she started tracing letters and wanted to write words, but my son was 5. Both children came from the same home and environment, but they were just different kids.

When should you start teaching your child’s name recognition?
I started when my kids were less than 3 years old. It is all about observation and seeing when your child is interested in letters. Mine was showing letters on signs and this was information for me that we can start.
How to teach name recognition a preschooler?

Playing is the best way, in my opinion, to teach children how to write their names. Nothing is as interesting for kids at this age as play. I created a large cardboard sign with my son’s name, and we made his name from letters. You can do anything that interests your child. If he likes cars, glue letters to the car and put them in the right order to create a sign with his name. Label his water bottle, backpack, and his works with his name. Below you can read more about how I played with my kids.
How to teach a child to write their name?
When you notice that your child is ready to start learning how to write letters, you can begin teaching them how to write their name. One way to do this is by making dots on paper for them to trace with a pencil. You can also use stamps and have your child trace the stamp marks. In my opinion, the best way is to use traceable fonts and create a variety of layouts on the computer, which can then be printed. This provides endless possibilities for teaching a child to write their name, as you can create any worksheet to fit their needs.
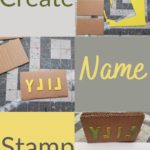
How to teach a child to write their name – 5 Steps
Step 1: Create a big sign with your child’s name on it.
Before teaching your child how to write their name, it’s important to understand that there are two key steps involved. The first step is teaching your child to recognize their name. The second step is making sure that your child is ready to write letters. Some children may show an interest in writing at a younger age, while others may take longer to develop this skill. With both of my children, I started by teaching them to recognize their name.
When my son was three, I created a simple toy using cardboard, foam, glue, and scissors. I glued two layers of cardboard together, and on one layer, I wrote my son’s name using outlined letters. I then cut out the letters and glued the remaining foam to the cardboard. This created a foam puzzle for my son to practice with.
How he used this toy?
- He was putting letters to the right place.
- He was looking at the cardboard sign and making a sign from foam letters.
- When he was ready to use crayons, he was writing letters of his name inside letters on the cardboard sign, and he liked this very much.
He knew that the word on the cardboard was his name and he eventually realized that he could arrange the foam letters to spell it out.
Step 2: Teach your child to sign his work.
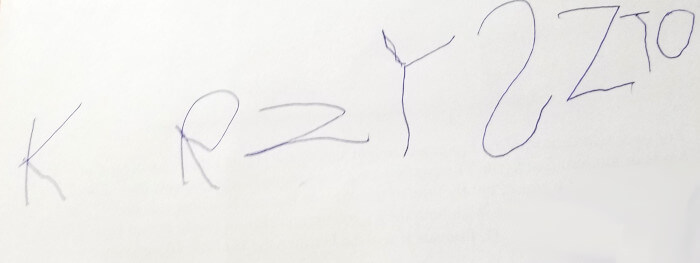
The next step I took was to teach him to sign his work. Even though he couldn’t write his entire name, he was able to write the letter “K”, which was a good indication that he knew it was the first letter of his name. At this point, he was also able to look at a signature and recognize whether or not it was his name.
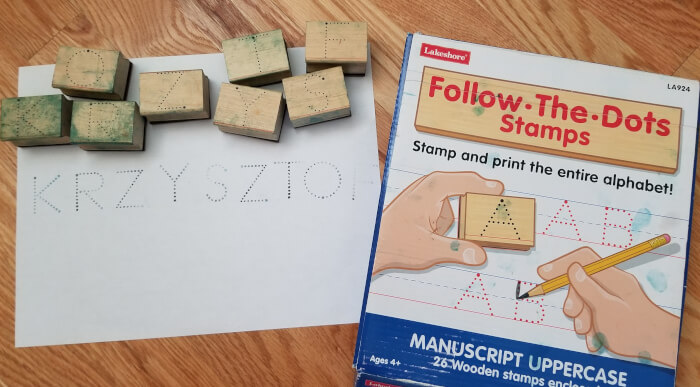
The first tool I used to teach my child how to write their name was letter stamps. I had these “Follow the Dots” stamps from The Lakeshore Learning. To teach him how to write his name, I took out the stamps with the letters of his name from the box. He made stamps and traced the letters.
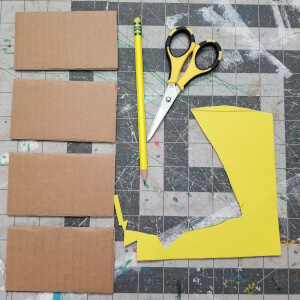
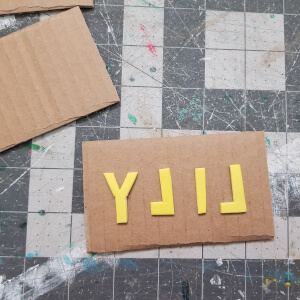
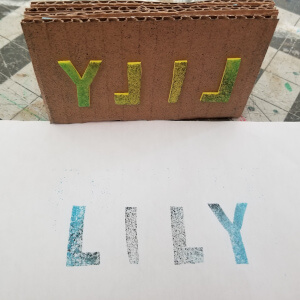
Step 3: Create a stamp with your child’s name.
One of the most enjoyable aspects of the learning process was when I created a stamp with his name. He loved stamping his name everywhere and was thrilled 🙂
How to create a stamp name?
- Write on the foam letters of your child’s name in the size you want them to be on the stamp. But remember to write them as they look in the mirror.
- Cut each letter and put them on the cardboard so they create your child’s name.
- Cut three the same size rectangles from cardboard. They should be big enough to fit all letters.
- Glue cardboard together.
- Glue letters on cardboard.
If you do not have big enough ink pad you can use markers or paint to use your stamp.
If you enjoy my work, please share it with others. By saving it to your board on Pinterest, you are giving me the opportunity to reach more people who, like you, are looking for free worksheets. There are many ways to support small businesses for free, and pinning the picture is one of them 🙂
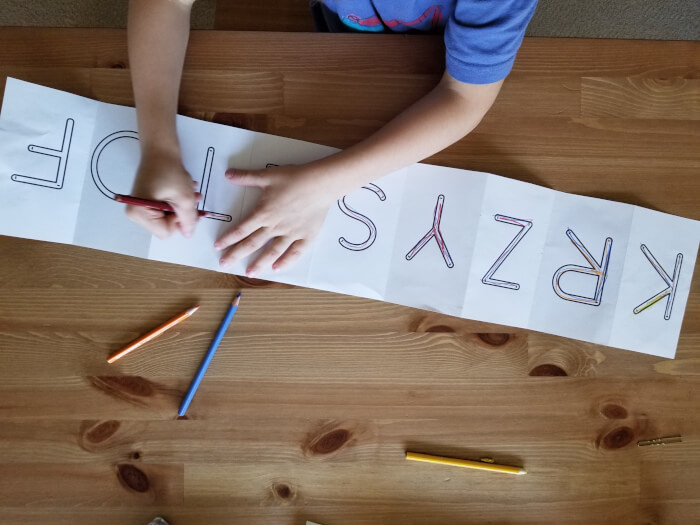
Step 4: Create a name booklet with outlined letters alphabet.
The next step we took to teach my son how to write his name was creating a name booklet with outlined letters of the alphabet. I printed letters from his name. To not create a large book, I used the setting of 4 pages per sheet on my printer. I then cut the pages into 4 equal pieces, so that each letter was on one rectangle. He arranged the letters in the correct order. I glued the pages together on the long edge (you can also use tape). I then folded the pages in an accordion style. To make covers you can cut two rectangles from cardboard; the size should match the folded booklet. Glue them to the beginning and end of the booklet. If the number of letters in your child’s name made it impossible to glue one of the cardboards, you can add an extra empty page to the booklet. In the end, I unfolded the booklet and let my child write letters inside the outlined letters. My son wrote 4 times with different colors.
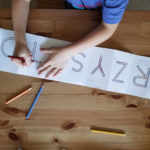
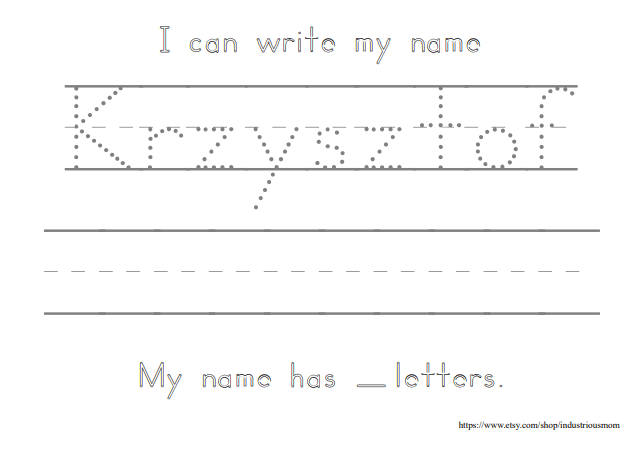
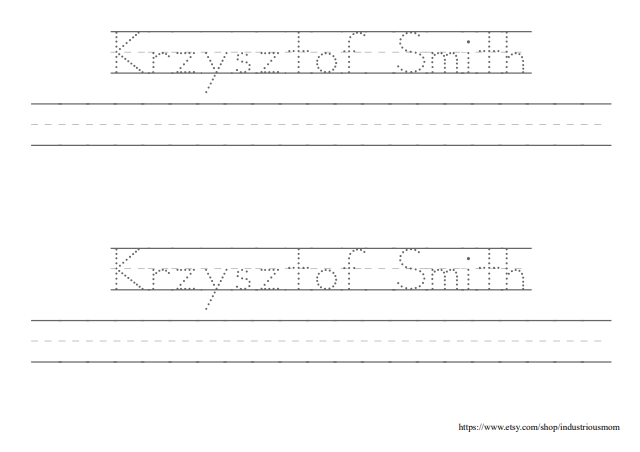
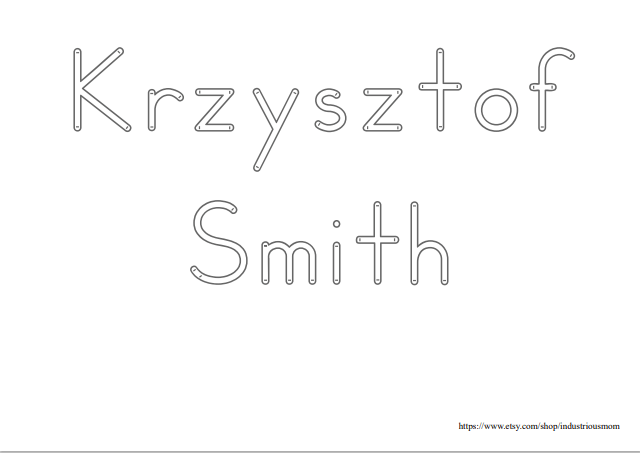
Step 5: Make tracing name pages with your child’s name to trace.
There are a few different ways to teach your child how to write their name. One simple method is to make dots with a pen and let them trace over them. However, this can become tedious if your child wants to practice often.
If you like to work with a computer and are willing to spend some time in front of it, you can create name tracing worksheets for your child. If you are familiar with Canva, then you can use font named KG Print and create as many worksheets as you want (in free version this font is available).
If you want more advanced or more creative worksheets, you can buy a block letter font (the cost for one font will be around $9.95). I use the ZNScript fonts in my worksheets. Download fonts. Close all programs like word, open office writer. Then install fonts on your computer (double click on the file). Now open the program that you use to create documents (to use font installed on your computer, you have to use program installed on your computer), set the font you want your child to trace, and start writing.
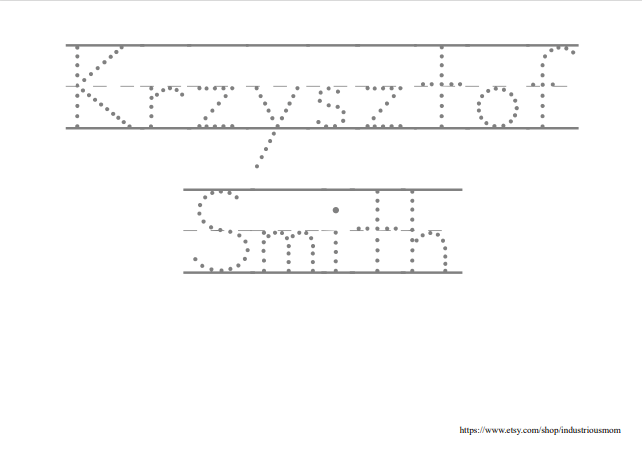
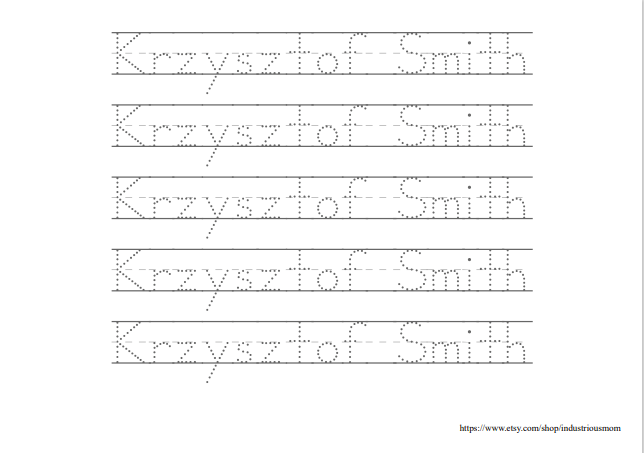
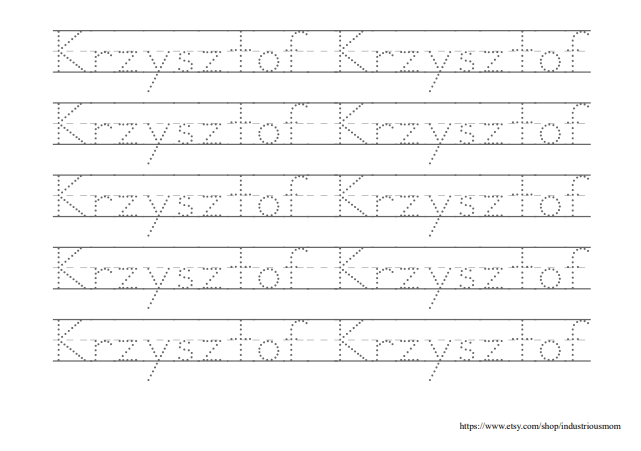
This is how I created for my son simple first and last name tracing pages. He liked to trace them. The plus in installing your own font is that you can use this font many times in many ways – create alphabet tracing pages, create words to trace, and even all sentences. The minus is the time you need to spend in front of your computer to make them. I’m very creative and I knew I will use this font in different ways, so I decided to buy it. Industriousmom project started later, when I saw my kids like my worksheets a lot. Now I share them here on this blog and in my Etsy store.

If you like this name tracing worksheets ideas and would like to them for your child, you can order them in my Etsy store.
Looking for free name tracing worksheets?
Not long ago, I decided to create an ultimate list of free name tracing worksheets. I have been adding new files to it periodically, and the list is growing. If you’re interested, you can check it out.
You can ask “Why you made so many things to teach your child how to write his name?”.
The first thing to understand is that my kids really enjoyed all activities related to their names. They were proud when they saw their name in a class or somewhere and were able to recognize it. Both of my kids have long names, so there was a lot for them to learn in terms of spelling them correctly. Additionally, as I am from Poland, I chose a Polish name for my son, which can be difficult to spell in Polish. Furthermore, we live in the US, and his name is not easy for American people to pronounce. My son’s name is KRZYSZTOF. I wanted him to know how to write his name correctly, as even teachers were making mistakes with it.